Views: 0 Author: Site Editor Publish Time: 2025-06-17 Origin: Site


Have you ever looked at a nearly empty bottle of your favorite serum or lotion and wondered, "What now?" Or perhaps you're a budding beauty entrepreneur, staring at a bulk shipment of containers, thinking about how to guarantee perfect hygiene. The simple act of cleaning cosmetic bottles is more crucial than you might think. It sits at the intersection of personal health, product quality, and environmental responsibility. Neglecting this step can lead to bacteria growth, skin irritation, and contaminated products, while mastering it can extend the life of your favorite items and elevate your brand's reputation.
This comprehensive guide will walk you through everything you need to know. We'll cover the essential reasons for cleaning, the right tools for the job, and detailed, step-by-step instructions for every type of container imaginable, from elegant glass dropper bottles to functional cosmetic spray bottles. Whether you are a conscious consumer looking to reuse your packaging or a business owner sourcing from cosmetic bottle suppliers, this is your definitive resource for maintaining the integrity and cleanliness of your cosmetic bottles. We'll explore the best practices that ensure the journey of your cosmetic bottles, from cosmetic bottle manufacturers to your shelf, is a clean and safe one.

Taking the time to properly clean your cosmetic bottles might seem like a small chore, but its impact is significant. For both individuals and businesses, this practice is a cornerstone of safety, quality, and sustainability. It goes far beyond just rinsing out a container; it's about protecting your skin, preserving your products, and upholding a standard of excellence.
Your skin is your body's largest organ, and it deserves the best care. Using products from uncleaned or poorly maintained cosmetic bottles can introduce a host of problems that you might not immediately attribute to your containers.
Preventing Contamination: Over time, leftover product residue can become a breeding ground for harmful bacteria and mold. Each time you use the product, you risk introducing these contaminants, which can compromise the formulation and its effectiveness. Cleaning your cosmetic bottles regularly helps prevent this unseen growth.
Avoiding Skin Issues: Have you ever experienced a sudden breakout or skin irritation for no apparent reason? Your dirty bottle could be the culprit. Bacteria transferred from a contaminated bottle to your skin can cause acne, allergic reactions, and other irritations. Keeping your cosmetic bottles clean is a simple yet vital step in your skincare hygiene routine.
Extending Product Life: A clean container is essential for maintaining the quality and efficacy of your products. By removing old residue and bacteria, you ensure that the active ingredients in your serums, lotions, and creams remain stable and potent for their entire intended lifespan. This ensures you get the full value out of every drop.
For a beauty brand, the container is just as important as the product inside. It's the first physical interaction a customer has with your brand, and its cleanliness is a direct reflection of your company's standards.
Ensuring Product Quality: If you are sourcing cosmetic bottles wholesale, ensuring they are perfectly clean before filling is a non-negotiable step in quality control. As a premier cosmetic bottle supplier, we at GZ J-Xing International Co., Ltd. understand this deeply. Our range of high-quality cosmetic bottles are manufactured to the highest standards, providing a pristine starting point for your products. However, we always recommend an additional in-house cleaning step to guarantee absolute sanitation before your unique formula is introduced.
Brand Reputation: A clean, high-quality product builds trust. When customers know that you prioritize hygiene, from sourcing your packaging from reliable cosmetic bottle manufacturers to your filling process, they are more likely to become loyal advocates for your brand. This commitment protects your reputation and fosters a deep sense of trust.
The Rise of Refill Culture: Sustainability is no longer a niche interest; it's a global movement. As more consumers embrace refillable and reusable packaging, the demand for durable, easy-to-clean cosmetic bottles has soared. Offering high-quality containers that can be effectively cleaned and reused positions your brand as a forward-thinking, environmentally conscious leader in the beauty industry.
Before you begin the cleaning process, a little preparation goes a long way. Having the right supplies on hand will make the job faster, easier, and more effective. It's also important to take a few simple safety precautions, especially when you move beyond basic washing to sanitizing.
You can effectively clean most cosmetic bottles with simple household items. For a deeper, more thorough sanitization, you'll need a few extra supplies.
Basic Cleaning Supplies:
Warm Water: Helps to dissolve and loosen product residue more effectively than cold water.
Mild Dish Soap or Gentle Cleanser: Choose a simple formula without harsh chemicals, dyes, or strong fragrances that could linger in the bottle.
Bottle Brushes: A set of brushes in various sizes is crucial for reaching the inside of different cosmetic bottles. Look for long, thin brushes for tall bottles and smaller brushes for detailed areas.
Microfiber or Lint-Free Cloth: Essential for drying the outside of your bottles and components without leaving behind fuzz or fibers.
Cotton Swabs or Q-tips: Perfect for cleaning the threaded necks of bottles, inside caps, and other small, hard-to-reach crevices.
For Deep Cleaning & Sanitizing:
70% Isopropyl or Ethyl Alcohol: This is the gold standard for sanitizing. Its concentration is effective at killing a broad spectrum of germs and it evaporates quickly without leaving a residue.
Small Funnel (Optional): This can be helpful for pouring alcohol into narrow-mouthed cosmetic bottles without spilling.
Toothpicks or Small, Soft Tools: Useful for scraping out stubborn, dried-on residue from corners or the base of a bottle.
Protective Gloves: Recommended if you have sensitive skin or when you are working with alcohol to prevent dryness and irritation.
Safety Goggles: A smart precaution when pouring and handling alcohol to protect your eyes from accidental splashes.
Ensuring Safety:
Work in a Well-Ventilated Area: This is especially important when using alcohol to ensure fumes can dissipate properly.
Read Labels: If you are using any commercial cleaning agents, always read the product labels and instructions first.
Keep Away from Children and Pets: Store all your cleaning supplies, especially alcohol, safely out of reach.
While different types of cosmetic bottles have their own unique challenges, this fundamental five-step process serves as a reliable foundation for cleaning almost any container. Mastering this method will ensure a thorough and consistent clean every time.
Step 1: Disassemble Completely
Before you even introduce water, take the bottle apart. Unscrew the cap, remove the pump or sprayer mechanism, take out the dropper assembly, and separate any other removable parts. This is the only way to ensure every single surface, nook, and cranny gets cleaned properly. Forgetting this step is a common mistake that leaves hidden residue behind.
Step 2: The Initial Rinse
Rinse the bottle and each of its individual components under warm running water. The goal here is to remove all the loose, easy-to-get product residue. Swirl water inside the main bottle and hold the components under the stream to wash away the first layer of grime. This makes the subsequent soaking and scrubbing steps much more effective.
Step 3: The Soapy Soak
Fill a basin or your sink with warm water and add a few drops of a mild dish soap or gentle cleanser. Submerge all the disassembled parts completely in the soapy water. Let them soak for at least 10 to 15 minutes. This soaking period is crucial as it works to soften and loosen any stubborn or dried-on product that the initial rinse couldn't remove.
Step 4: Scrub with Precision
After soaking, it's time for the most active part of the cleaning process. Use a bottle brush that is appropriately sized for your cosmetic bottles to scrub the interior walls, base, and shoulders of the main container. Use smaller brushes or cotton swabs to clean the threaded opening, the inside of the cap, and any other intricate parts. Pay extra attention to corners and crevices where residue loves to hide.
Step 5: Final Rinse and Air Dry
Thoroughly rinse the bottle and all its components under clean, warm running water. It's vital to remove every last trace of soap residue, as any left behind could interfere with the product you fill it with later. Once rinsed, place all the parts on a clean, lint-free towel or a drying rack. Allow them to air dry completely. Do not reassemble the bottle while it is still damp, as trapped moisture can lead to the growth of mold and bacteria.
While the five-step method works for most containers, certain types of popular cosmetic bottles require a little extra attention and some specialized techniques to get them perfectly clean. Understanding the unique challenges of each design is key to mastering your cleaning routine.
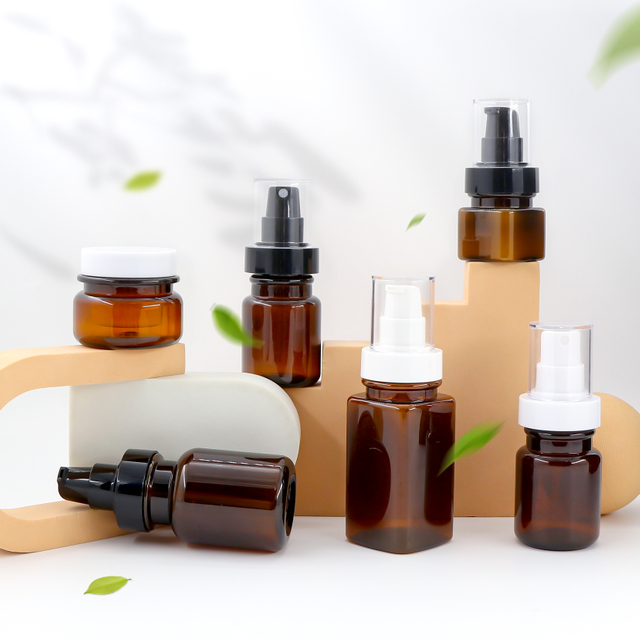
Cosmetic pump bottles are fantastic for dispensing products like lotions, liquid foundations, and serums cleanly, but that complex pump mechanism can be a trap for thick liquids.
The Challenge: The internal tube, spring, and chamber of the pump can hold onto a surprising amount of old product.
Specific Steps:
First, disassemble the pump from the bottle. Clean the bottle itself using the standard 5-step method.
To clean the pump, submerge it in your basin of warm, soapy water.
While it's submerged, press down on the pump head repeatedly. This action forces the soapy water to flow through the entire mechanism, flushing out the internal chamber and tube.
Next, transfer the pump to a basin of clean, warm water and repeat the pumping action to rinse out all the soap. Continue until the water being dispensed is completely clear.
For a final sanitizing step, you can pump 70% alcohol through the mechanism, followed by allowing it to air dry completely before reattaching it to the bottle.
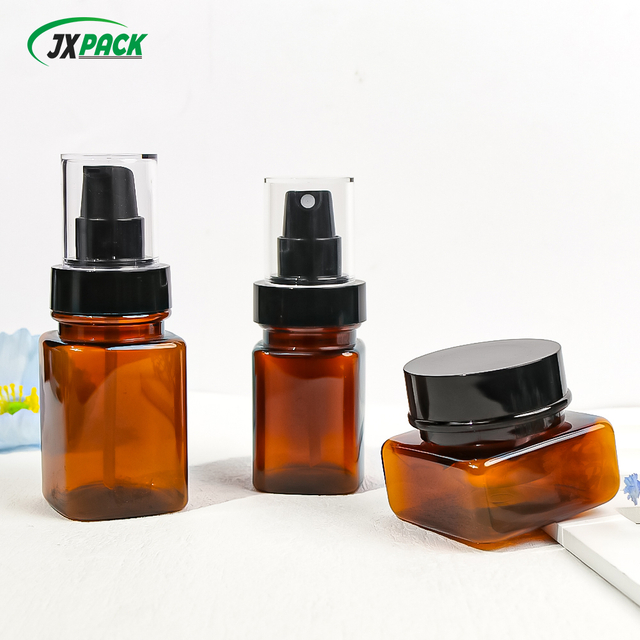
A cosmetic spray bottle is perfect for face mists and toners, but its fine nozzle is prone to clogging over time, resulting in a weak or uneven spray.
The Challenge: Mineral deposits from water or fine particles from the product can easily block the tiny opening of the spray nozzle.
Specific Steps:
Clean the spray mechanism using the same process as cosmetic pump bottles. The key is to pump soapy water, then clean water, through the nozzle to clear its internal path.
If the nozzle remains clogged after flushing, you can use a fine pin or a needle to gently poke the opening. Do this carefully to avoid damaging the nozzle. Soaking the nozzle head in warm water for a few minutes before this step can help soften the blockage.
The material of your bottle influences both its feel and the best way to clean it. As a trusted cosmetic bottle supplier, we offer a vast selection of both glass and plastic options to suit every brand's needs.
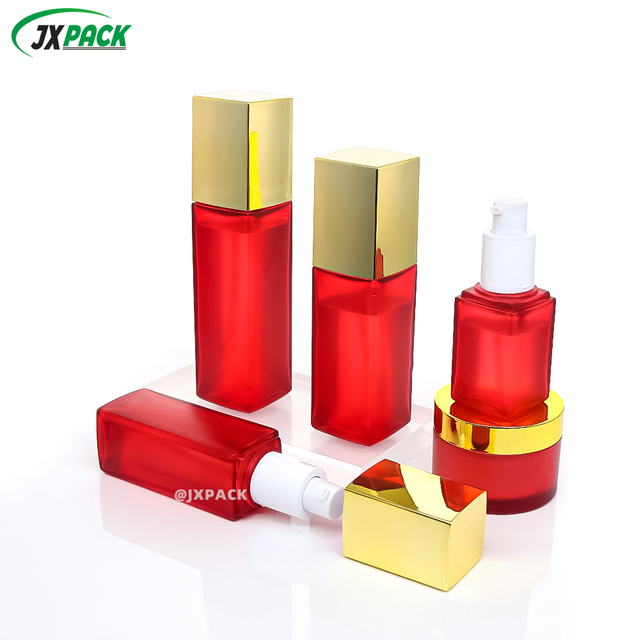
Cleaning Cosmetic Bottles Glass (Serums, Perfumes, Oils):
Advantages: Cosmetic bottles glass are a premium choice for a reason. Glass is non-porous, meaning it won't absorb product residue or odors. This makes it exceptionally easy to clean thoroughly and return to a pristine state, perfect for luxury skincare.
Process: The standard 5-step method is highly effective for glass. You can typically use slightly warmer water without any risk of damage. For stubborn oily residues, try wiping the interior with a cotton swab soaked in rubbing alcohol before the soapy wash to break down the oil first.
Cleaning Plastic Bottles (Lotions, Shampoos):
Considerations: Plastic is lightweight and durable but requires a bit more care. Be cautious with very hot water, as it can warp or soften certain types of plastic. Also, avoid using overly abrasive brushes or scouring pads, which can create tiny scratches on the surface that can trap bacteria.
Process: The 5-step method works perfectly. Pay extra attention during the final rinse, as soap residue can sometimes cling to plastic surfaces more readily than glass. Ensure it's squeaky clean before drying.
Dropper bottles are standard for potent serums and oils, allowing for precise application. Cleaning them properly involves tending to the bottle, the glass pipette, and the rubber bulb.
The Challenge: Getting the inside of the narrow glass pipette and the flexible rubber bulb completely clean and dry.
Specific Steps:
Unscrew the cap and separate the full dropper assembly from the bottle.
Clean the bottle itself using a small brush.
To clean the dropper, squeeze the rubber bulb to expel any remaining product.
Submerge the dropper in warm, soapy water and repeatedly squeeze and release the bulb. This will suck soapy water up into the pipette and then force it out, thoroughly cleaning the inside.
Repeat this process in a basin of clean water to rinse it completely.
It's critical to ensure the rubber bulb and the pipette are bone dry inside and out before reassembly to prevent mold.
While regular cleaning is great for maintenance, there are times when you need to go a step further to sanitize your cosmetic bottles. Understanding the difference is key to ensuring the highest level of hygiene.
Cleaning physically removes dirt, germs, and residue from a surface. Sanitizing takes it a step further by using a chemical agent to kill the vast majority of bacteria and pathogens that may remain after cleaning. You should always sanitize your cosmetic bottles when:
Repurposing a Bottle: If you are going to fill an old bottle with a completely new product.
Dealing with Skin Issues: If you have sensitive, compromised, or acne-prone skin, regular sanitization provides an extra layer of protection.
Professional Use: If you are a business owner preparing cosmetic bottles wholesale for filling, sanitization is an essential part of your quality assurance and Good Manufacturing Practices (GMP).
You don't need complicated equipment to effectively sanitize your cosmetic bottles. A simple alcohol rinse is a professional-grade technique that is both easy and highly effective.
The "Why": 70% alcohol is the ideal concentration. It contains enough water to help it penetrate the cell wall of bacteria and kill it, but it's concentrated enough to be effective. It also evaporates quickly without leaving behind any harmful residue.
The "How":
Start with a bottle that has already been cleaned and is completely dry.
Put on gloves to protect your hands.
Pour a small amount of 70% isopropyl alcohol into the bottle.
Secure the cap and swirl or shake the bottle to ensure the alcohol coats all interior surfaces.
Pour out the excess alcohol. You can also use an alcohol-soaked, lint-free cloth to wipe down the exterior of the bottle and all of its components (caps, pumps, etc.).
Place all the parts on a clean surface in a well-ventilated area and allow them to air dry completely. The alcohol will evaporate, leaving you with a sanitized container.
As we become more environmentally conscious, more of us are looking to recycle our empty cosmetic bottles. But there's a lot of confusion about how clean they need to be before they go into the bin.
The short answer is yes. In almost all cases, recycling facilities require containers to be empty, clean, and dry. There are a couple of very important reasons for this rule.
Preventing Contamination: A single container with leftover product can leak and contaminate an entire bale of recyclables. For example, oily residue from a lotion bottle can ruin a batch of paper and cardboard, causing the whole lot to be sent to a landfill instead of being recycled.
Facility Operations: Leftover product can clog the machinery at Materials Recovery Facilities (MRFs). It can also attract bugs and other pests, creating unsanitary conditions for workers.
You don't necessarily need to perform a full sanitization, but the bottle should be visually clean. A good rule of thumb is the "scrape and rinse" method. Use a small spatula to scrape out as much of the remaining product as possible. Then, give the container a quick rinse with a little soap and water to remove the greasy film, and let it dry. This is usually sufficient for most municipal recycling programs.
You've gone to all the trouble of perfectly cleaning and drying your cosmetic bottles. The final step is to store them properly to ensure they stay that way until you're ready to use them.
Dry Completely: We can't stress this enough. This is the single most important step. Any trapped moisture is an invitation for mold and bacteria to grow. Be patient and let every component air dry fully.
Cool, Dark, and Dry: Store your empty, clean cosmetic bottles in a cabinet, box, or drawer where they are protected from direct sunlight and humidity. Heat and sunlight can degrade certain materials over time.
Prevent Dust: If you are storing them for an extended period, place them in a sealed, airtight container or a zip-top bag. This prevents dust and other airborne contaminants from settling inside.
For Businesses: Proper storage is a critical operational step. Just as a top-tier cosmetic bottle manufacturer like ships cosmetic bottles in sealed, sanitary packaging, you should adopt similar practices in your own facility. Storing your clean, empty inventory in sealed containers maintains their hygiene and ensures they are ready for production at a moment's notice.
Q1: How often should I clean my cosmetic bottles?
It is highly recommended to clean your personal cosmetic bottles at least once a month. However, if you notice any residue, buildup, or change in the product's smell or texture, you should clean it immediately. For products used around the eyes, more frequent cleaning is advisable.
Q2: Can I use bleach to clean my cosmetic bottles?
It is generally not recommended to use bleach. Bleach is a harsh chemical that can degrade or damage the material of your cosmetic bottles, especially plastics. It can also leave behind strong odors and residue that could be harmful if they come into contact with your skin. Sticking to mild dish soap for cleaning and 70% alcohol for sanitizing is much safer and more effective.
Q3: Can I put my cosmetic bottles glass or plastic bottles in the dishwasher?
This can be risky. While a very sturdy glass bottle might be safe on the top rack of a dishwasher, the high heat can easily warp plastic cosmetic bottles. Furthermore, small and delicate parts like pumps, sprayers, and droppers can be damaged or lost. Water jets in a dishwasher may also not be effective at cleaning the inside of narrow-necked bottles. Hand washing is always the safest and most thorough method.
Q4: Is it safe to reuse cosmetic pump bottles for different products?
It is generally best practice to avoid this to prevent cross-contamination. Mixing residue from an old product with a new one can alter the formula, reduce its effectiveness, and potentially cause skin reactions. This is especially true when switching between different types of formulas, such as an oil-based product and a water-based one. If you absolutely must reuse a bottle, you must perform a rigorous cleaning and sanitization process.
Q5: Are there special considerations for cleaning eco-friendly or sustainable cosmetic bottles?
Yes, potentially. Materials like bamboo, wood, or certain biodegradable plastics (PCR) may have specific care instructions. They might be more sensitive to prolonged soaking or harsh chemicals. Always refer to the manufacturer's guidelines. When you source your packaging from a knowledgeable supplier, they can provide guidance on the best cleaning practices to maintain the integrity of these specialized cosmetic bottles.
For inquiries about our extensive selection of wholesale cosmetic bottles, contact our expert team today to find the perfect packaging solution for your brand.